 |
| Beginning of Turn 1 |
Right off the bat, I draw a hand of entirely allies. I'm really tempted to mulligan, and fish for Steward of Gondor but I decide to stick with it. I've seen worse hands. At least most of the allies are Leadership, so they will work well with my two Leadership heroes.


I then decide to travel to the new location, Forest Gate, which actually allows me to draw 2 new cards. One of them was Steward of Gondor! I was hoping to get this early. Now I can likely rush out as many allies as I want.
In the encounter phase, the Forest Spiders engages me. I only have Aragorn ready, but I decide to take the damage with him undefended, so he can attack back, inflicted 2 damage on the Spiders. Next turn I will be far more prepared.
 |
| Beginning of Turn 2 |
 Turn 2 was fairly uneventful. I deployed a Longbeard Orc Slayer, and a Snowbourn Scout to use as a meatshield, and chip away at the location I travelled to. I repeated my questing strategy from turn 1, with a bit of an easier time, and this time another Forest Gate appeared. I'm not liking how these locations are piling up. Thankfully this deck's specialty is chewing through locations!
There are no new encounters, and the Forest Spider devours my scouts, only to be struck down by Aragorn and the Longbeard.
 |
| Beginning of Turn 3 |
Turn 3 I come out the gate swinging, deploying more Scouts, finishing my active location with their ability. I also deploy a Silverlode Archer to help with combat, and a Northern Tracker with a special ability that allows them to place progress tokens on all locations in the staging area! Now that's what I'm talking about.

I engage the Orcs, and tragedy strikes. Their shadow card forces me to discard Steward of Gondor! Hopefully I can find another one soon. I effortlessly block with my Longbeards, and strike them down with Aragorn. I'm starting to really miss Legolas and his ability to rack up progress tokens with his kills.
Turn 4 passes rather uneventfully. I play an even which allows me to draw a card, getting nothing immediately useful. I decide to hoard my resources, since I'm a bit short at the moment. Questing proceeds smoothly, finishing off my active location, and putting a token on the Quest. Some more Forest Spiders come out, but their Shadow card doesn't activate. I throw my Scout in their path, and Aragorn and my Longbeard gut him.
 |
| Beginning of Turn 5 |
In Turn 5 I manage to deploy a Lorien Guide, who has the bonus ability of being able to add extra tracking tokens to the active location. I commit most of my characters with spirit to the quest, holding back my Tracker in case I need someone to block with while my Longbeard and Aragorn do the damage. I figure I'm in a good position, since my Spirit is 7, the staging area only has a threat of 1 at the moment, and I only need to succeed by 4 in order to move onto the next Quest card.
However, the new card that comes out is a Location with a threat of 3, dashing my hopes. I decide to activate Eowyns ability again, discarding Dunedain Mark. It's an attachment I don't think I will have much use for. This allows me to raise my Spirit by that extra one, and onward and upward I go. I decide not to travel anywhere, and so ends turn 5, with no enemies in sight.
 |
| Beginning of Turn 6 |
Turn 6 I finally hoard enough resources to deploy Brok Ironfist. He's powerful enough to be a hero in his own right! I commit most of my heroes with spirit to the quest again, easily matching the threat in the staging area, including the Dol Guldur Beastmaster that comes out. I place my two progress tokens and move onto the final stage of the Quest!

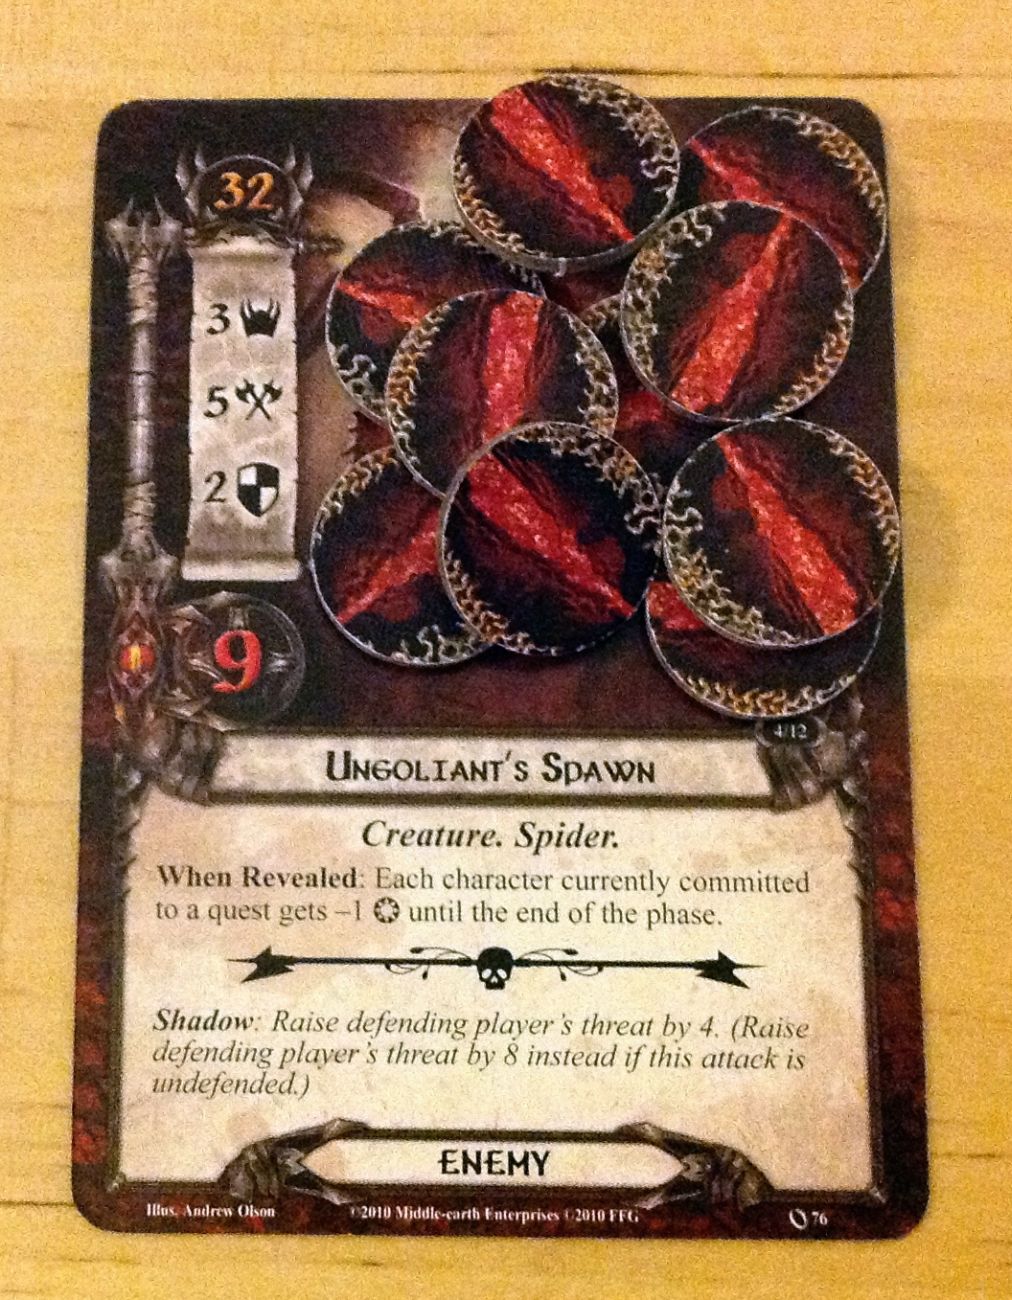
 I must pick one of two different paths for this final stage and I pick one that says I must search the deck and discard pile for a spider card of my choice. I must then find and defeat Ungoliant's Spawn to win the quest. Well the obvious decision is to put out Ungoliant's Spawn right away and knock this out. So that is exactly what I do.
Now this encounter step, this might get ugly. Luckily my threat is low enough that the Beastmaster does not engage yet! I really hope I get a card that lowers my threat next turn so I can focus on the Spawn. I deal it a Shadow Card which would discard another of my attachments, but I don't have any this time. Sadly, it's time for my Longbeard to fall on his Axe. I sacrifice him to the Spawn so that Brok and Aragorn can do some damage. The Spawn survives...for now.
 |
| Beginning of Turn 7 |

The only thing that comes out is a Treachery card, which I then cancel using an event I had in my hand. Now it's just me against the monsters.
I throw my Scout at the Spawn, and I toss my Guide at the Beastmaster. The Spawn's Shadow Card was a dud, but the Orc gets two thanks to his special ability, and both increase his attack power! Well, that's fine, I wasn't expecting to get that guide back anyhow. Now lets see if I have enough power left over to defeat the Spawn and win the game! I need to deal a combined total of 8 damage. Aragorn, Theodred, Brok and my Archer makes 9, so that's the game! My final score ends up being 40. 35 for my threat, and 5 for the damage on my heroes. It's a score I guess?
 |
| Sweet Victory |
No comments:
Post a Comment